
Objects to New Layer 2024
Win64, EnglishGeneral Usage Instructions
Step 1: Grouping Data
- Organize your data into groups and ensure each group is properly named.
Step 2: Accessing the Plugin
- Navigate to the "Layer" menu.
- Select "ObjectstoNewLayersV2.0" from the plugin options.
- Choose the option box to access additional features of the plugin.
Step 3: Running the Plugin
- Customize your options as needed.
- Click "Go" to execute the plugin based on your chosen options.
Creating Layers:
Overview: Create new layers and easily assign objects to them using MyPlugin.
- Ensure your objects are properly named.
- Navigate to the "Layers" menu.
- Select "ObjectstoNewLayerV2.0" from the plugin options.
- Choose the "Add to new layer" checkbox in the option box.
Creating Shaders:
Overview: Add shaders to your objects effortlessly with MyPlugin.
- Select your objects.
- Go to the "Layers" menu.
- Choose "ObjectstoNewLayerV2.0" from the plugin options.
- Check the "Add Shaders" checkbox in the option box.
Creating Folders:
Overview: Organize your layers into folders for better management.
- Ensure your objects are named with an underscore prefix for folder creation.
- Layers with similar names before the underscore will be grouped into a folder.
- For example, "Wheels_Front" and "Wheels_Rear" will be grouped under a folder named "Wheels."
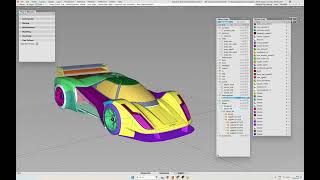
Screenshots


Commands
Installation/Uninstallation
The installer that ran when you downloaded this app/plug-in from the Autodesk App Store will start installing the app/plug-in. OR, simply double-click the downloaded installer to install the app/plugin.
You can unload the plugin without uninstalling it by unchecking the "Load/Unload" check box associated with the plugin in the Autodesk® Alias® Plug-in Manager. You may have to restart Alias to completely unload the application.
To uninstall this plug-in, exit the Autodesk product if you are currently running it, simply rerun the installer, and select the "Uninstall" button. OR, you can uninstall it from 'Control Panel/Programs and Features' (Windows 10/11), just as you would uninstall any other application from your system.
Additional Information
Known Issues
When selecting lights or cameras, they will also be added to a new layer with their respective names.
Layers containing ungrouped surfaces will not be assigned to folders. Instead, an empty folder will be created with the layer's name.
When rerunning the plugin with existing layers and folders, a new set will be created. Make sure to delete unused layers using the "Delete Unused Layers" tool. The same applies to shaders.
If you experience performance issues in Alias after using the plugin, unload the plugin and restart your PC and Alias.
Start by using the plugin with lighter datasets before trying heavier files.
Please be aware that while the plugin aims to enhance workflow efficiency, users should use it at their own discretion. In rare cases, the plugin may cause crashes or Alias may freeze due to lack of memory.
If you encounter any issues, please report them to karthick3d@gmail.com. If possible, share your workflow as well for a better understanding of the issue.
Contact
Author/Company Information
Support Information
For product support, feel free to contact me via email at karthick3d@gmail.com. Your feedback and inquiries are important to me, and I'll be sure to promptly assist you with any questions or issues you may have. Your satisfaction is my priority, and I am dedicated to providing excellent support to ensure a seamless experience with my product. Don't hesitate to reach out—I'm here to help
Version History
| Version Number | Version Description |
|---|---|
|
2.0.0 |
New Features Included: 1. Random Shader Assignment: Assign a random shader to each selected object automatically. The shader will be named after the corresponding object for easy identification. 2. Improved Data Organization: Now, with just one click, you can add layers to folders and enhance the organization of your data structure. This feature allows for better organization and management of your data. For More Information: Watch the tutorial video linked below to learn more about these new features and how to use them effectively. |
