
Drill
Win32 and 64, EnglishGeneral Usage Instructions
-
Draw the assembly of the parts in the form of solids. Surfaces, Meshes, and flat drawings will be ignored. Use any of the layers.
-
Switch the default layer to "Holes". If you do not have such a layer, create it. Layer settings do not matter - the main thing that corresponds to the layer name. Or use DRI with the option “HoleLayer”.
-
Draw holes in the form of cylinders or any other solids. One hole can penetrate as many details as necessary. This ensures concentricity. Optimize and negotiate the location of fasteners at this stage. For standard fasteners, useful blocks containing fasteners and holes in the body.
-
Call command Drill (DRI). Command will use the preselected object if possible. If no selected, the command will require selecting solids and will show options: Gap, SaveHoles|DeleteHoles, and HoleLayer.
-
Gap – option to configure the gap between details. If you set the gap to more than zero program will increase (inflate, swell) the hole-solids before subtraction.
-
SaveHoles|DeleteHoles – You can choose to delete hole-solids at the end of work or not delete them. Solid in block never deleted.
-
HoleLayer - enter layer name. Have an option to query for a select layer to select for each Drill command.
-
INBlocks - the option allows to subtract FROM blocks. That is, if there are solids in the blocks, the program will subtract and drill them with all holes from the model and from all blocks. The program will work even if the parts are in some blocks, and the holes are in other blocks. The option does not work for nested blocks - only for blocks inserted directly into the model. The program will not subtract from the solids and blocks of the "Holes" layer, so that the holes do not self-destruct. The option does not affect the search for subtracted holes in any way - their program will always search inside blocks and nested blocks.
-
If layer Holes do not exist, you will see a dialog window with a layer list. You must click on the layer with the hole-solids. Only the selected object layer is in the list.
-
After selecting all solids, wait for the end of the command. If thousand details, the better to prepare tea. Working time grows geometrically with the number of holes. But it is still much faster than doing a separate command _Subtract every hole.
-
At the end of its work, the program will show how to make a hole.
If we were allowed to record the solid history, it would be automatically disabled. I strongly recommend disabling recording solid history from the beginning of modeling (System variable SolidHist = 0).
Follow the messages on the console. There may be error messages.
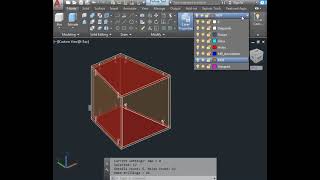
Screenshots


Commands
| Ribbon/Toolbar Icon | Command | Command Description |
|---|---|---|

|
DRI |
Drill holes from special layer |
Installation/Uninstallation
The installer that ran when you downloaded this app/plug-in from the Autodesk App Store will start installing the app/plug-in. OR, simply double-click the downloaded installer to install the app/plugin. You may need to restart the Autodesk product to activate the app/plug-in. To uninstall this plug-in, exit the Autodesk product if you are currently running it, simply rerun the installer, and select the "Uninstall" button. OR, click Control Panel > Programs > Programs and Features (Windows 10/11) and uninstall as you would any other application from your system.
Additional Information
Updates
Follow A>V>C> news on Facebook, Twitter, and Telegram.
If you have an interest in the new version, just download it from the A>V>C> website and unpack it into the same directory the replacing all files. The Autodesk® AutoCAD® course must be closed.
Updates are free. Reactivation is not required.
Known Issues
Contact
Author/Company Information
Support Information
Support is provided by e-mail avc.programming@gmail.com
You can ask any questions about the work of A>V>C> programs, their installation and configuration, optimization of the work of engineers, and setting up business processes in the exhibition business. Help is provided to all users, regardless of whether they donated or not. Any suggestions and comments are welcome for further improvement of the programs.
The main method of communication is e-mail. You can write in any language. If you do not write in English, then write in short, simple, but complete sentences without abbreviations and special terms.
Do not forget to attach the problem DWG file to the letter.
Telegram: @avc_programming
WhatsApp: A V C Programming
Version History
| Version Number | Version Description |
|---|---|
|
2025.08.02 |
GAP command moved to AVC_SolidSub plugin Drill fixed: now the surfaces of the holes do not turn red (like the color of the subtracted solids). Drill & CSub: The commands can now work with the layer list and layer masks to select subtracted objects. |
|
2024.03.00 |
AutoCAD 2026 compatibility. |
|
2023.11.01 |
All updates for November 2023. |
|
2021.11.01 |
Added 2024 support. |
|
2020.2 |
Added 2022 support (No change in version number). |
|
2019.3.4 |
Compatible with Autodesk® AutoCAD® 2020. New activation system. |
|
2018.3 |
Compatible with AutoCAD 2019 Working with holes in blocks of any nesting in each other German name for hole layer |
|
2017.3 |
• Compatible with AutoCAD 2019 • New version numbering • New activation window |
|
3.0 |
• Gap between details • New command GAP • Hole-layer dialog • Command ASU renamed to DRI • Activation dialog renew • New command icones • New screenshots • New plug-in description |
|
2.0 |
AutoCAD 2017 compatibility Trial version and Activation window Optimized localization Short command name ASU Drop button AVCSubOption Fixed typos |
|
1.3 |
Corrected error of entering layer name with space. Added options to AvcSub command. Added Menu and Panel for classic interface.
Added AVCMessage command. |
|
1.1.0.0 |
Auto shutdown of recording history of solids |
|
1.0.0.0 |
Initial Release |
