
RayTracer
Win64, EnglishGeneral Usage Instructions
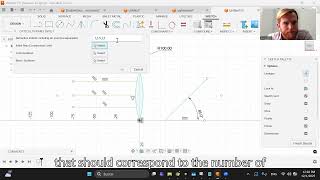
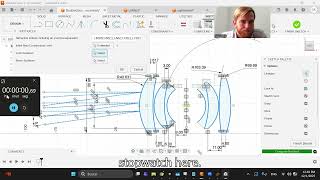
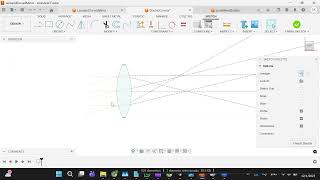
- Create a 2D sketch of a lens/mirror system using lines and arcs.
- Draw rays at the desired incidence angle with the lens system.
- Open RayTracer and fill out the desired refractive indices for the full system.
- Select the rays, mirror surfaces, and lens surfaces.
- Press OK and wait for the result.
If the add-in doesn't load automatically, you can load it as follows:
Go to the [Utilities] tab → [Add-Ins] section → [Scripts and Add-Ins] → locate "RayTracer" and enable it. Done!
Screenshots


Commands
Installation/Uninstallation
Install:
The installer that ran when you downloaded this app/plug-in from the Autodesk App Store will start installing the app/plug-in. OR, simply double-click the downloaded installer to install the app/plugin.
Uninstall:
You can unload the add-in without uninstalling it by clicking the "Stop" button when the add-in is selected in the list box on the "Add-Ins" tab of the "Scripts and Add-Ins" dialog.
Unchecking "Run on Startup" causes the add-in not to be loaded in future sessions of Fusion.
To uninstall this plug-in, exit the Autodesk product if you are currently running it, simply rerun the installer, and select the "Uninstall" button.
OR, you can uninstall it from 'Control Panel/Programs and Features (Windows 10/11), just as you would uninstall any other application from your system.
Additional Information
Ensure that initial rays are created with the end point constrained on the first surface.
Ensure that all lens and ray, and mirror sketches are fully constrained before running the program.
Known Issues
If angles are extreme, odd ray behavior can occur. Spline lenses or mirrors cannot be used.
Contact
Author/Company Information
Support Information
Contact at https://www.apereon.com/contact, through the Autodesk app page, or email gavin@apereon.com.
Version History
| Version Number | Version Description |
|---|---|
|
1.0.0 |
First released version of this tool. |
