MapBoards
Win64, EnglishGeneral Usage Instructions
See The Basics for an introduction to MapBoards and an overview of the available features. Reading this user guide before getting started, will help you get the most out of MapBoards.
When a project moves from the design phase to the build phase, a material estimate and layout is needed to guide the manufacturing process. MapBoards can help with both.
Begin with your 3D model open in the Fusion Design Workspace:
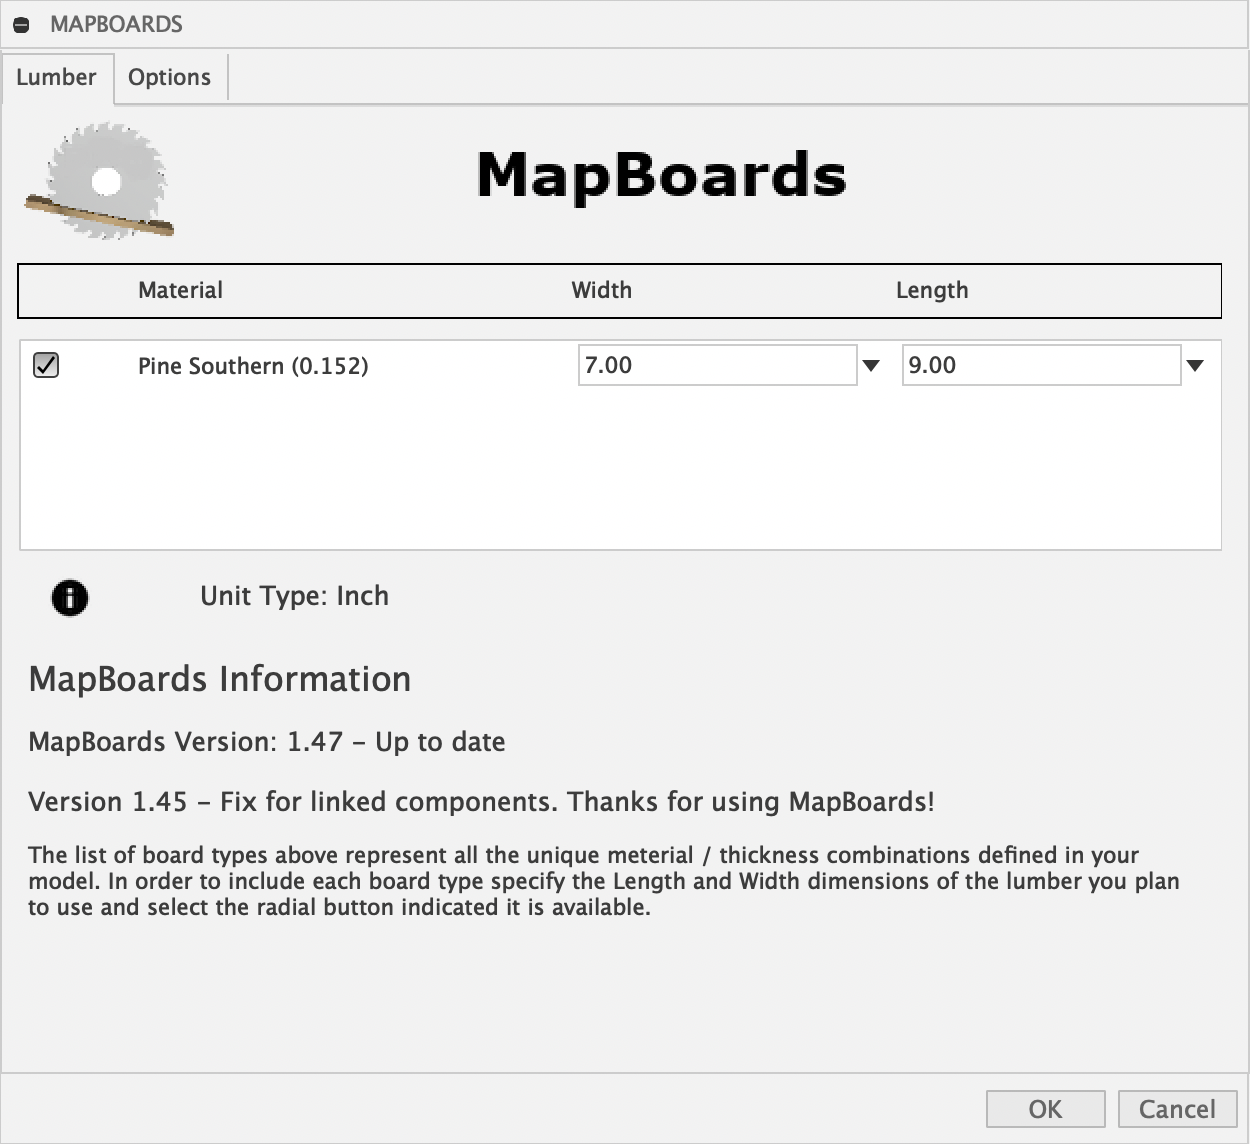
- Invoke MapBoard
- From the Lumber tab, update the Width and Length for each board type to match lumber dimensions available or that you plan to acquire
- Select the radial button on the left side of each board type to include them in the map generation
- Use the options tab to select your desired Map Output Type, Arrangement Type, Component Spacing, Board Edge, Cut List and others
- Select OK to run MapBoards to create map using copies of the components in the model
Once complete, the created map will be displayed alongside the design on the XY plane (Z up) (optionally Y up on XZ plane). The map visibility can be controlled with the visibility icon (LightBulb) on the newly created map component. Selecting the Cut List option will create a file which can be used for label making or a checklist.
MB can also export maps as simplified layered DXF files for use with other CAD and CAM software. The DXF file will include component profiles and optionally cutouts and board perimeters as separate layers.
For a description of the available add-in features, visit the link below.
Commands
Installation/Uninstallation
Install:
The installer that ran when you downloaded this app/plug-in from the Autodesk App Store will start installing the app/plug-in. OR, simply double-click the downloaded installer to install the app/plugin.
Uninstall:
You can unload the add-in without uninstalling it by clicking the "Stop" button when the add-in is selected in the list box on the "Add-Ins" tab of the "Scripts and Add-Ins" dialog.
Unchecking "Run on Startup" causes the add-in not to be loaded in future sessions of Fusion.
To uninstall this plug-in, exit the Autodesk product if you are currently running it, simply rerun the installer, and select the "Uninstall" button.
OR, you can uninstall it from 'Control Panel/Programs and Features (Windows 10/11), just as you would uninstall any other application from your system.
Additional Information
Here is a link to the sample design shown in the video demo of MapBoards. You can Open or Download it to view in Fusion and then run MapBoards on it once installed.
https://gallery.autodesk.com/fusion360/projects/120224/mapboards-demo-design
Known Issues
Running MapBoards requires Capture Design History to be set.
Contact
Author/Company Information
Support Information
Contacting support will be through email, icarusvanca@gmail.com
See the following link for a description on how to collect log files needed for support.
Version History
| Version Number | Version Description |
|---|---|
|
1.891 |
- Refresh |


