
Smart Slope Generator
Win64, EnglishGeneral Usage Instructions
Getting Started with Smart Slope Generator...
Installation & Setup
- Run Installer: After downloading, run the .msi file. It automatically detects Autodesk® AutoCAD® Verticals and Autodesk® Civil 3D® (2025/2026) versions.
- Directory: Files are placed in the secure ApplicationPlugins folder.
- Ribbon Access: Upon launching, look for the "Add-ins" Ribbon Tab (integrated for a cleaner workspace).
Step-by-Step Workflow:
1. Launching the Command
- Via Ribbon: Navigate to the Add-ins tab and click the DRAWSLOPE icon.
- Via Command Line: Simply type DRAWSLOPE and press Enter.
2. Configuring Parameters (Interactive Dialog)
The new dialog features a Live Preview Canvas that reflects changes instantly. Adjust these settings:
- Step: Defines pattern density (distance between lines).
- Ratio: Controls the length of shorter intermediate lines (e.g., 50%).
- Offset: Sets the gap between the pattern ends and the boundary lines.
- Layer & Color: Select an existing layer or create a new one directly from the UI.
3. Choosing the Generation Method
- Elastic (Default): The most advanced method. It proportionally distributes lines and allows for manual "fixing" of overlapping areas in complex turns.
- Perpendicular: Forces lines to be 90° to the Crest, ideal for structural walls.
- Hybrid: A smart mix that adapts to varying geometry.
4. Execution & Selection
Click the "Draw" button.
- Prompt 1: Select the Upper Curve (Crest).
- Prompt 2: Select the Lower Curve (Toe).
Note: The tool supports 2D/3D Polylines and Civil 3D Feature Lines. Ensure "Is 3D" is checked in settings if elevation data is required.
Tips for Best Results
- Clean Geometry: For the best results with the Elastic method, ensure your polylines don't have self-intersections.
- Smart Memory: The plugin remembers your last-used settings (Step, Ratio, Color), so you don't have to re-configure for every new slope.
- F1 for Help: If you get stuck, simply press F1 while the command is active to open the detailed offline documentation.
Summary
- Launch: Click Draw Slope in the Add-ins tab or type DRAWSLOPE.
- Configure: Use the Live Preview to set your Step, Ratio, and Method.
- Draw & Select: Click Draw, then select Crest, then Toe.
- Finish: Press Enter to finalize. Your pattern is created as lightweight, standard AutoCAD objects.
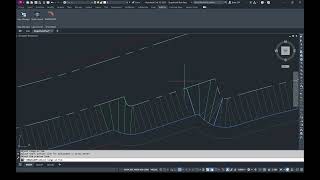
Screenshots


Commands
| Ribbon/Toolbar Icon | Command | Command Description |
|---|---|---|

|
DRAWSLOPE |
|
Installation/Uninstallation
Installation: Run the downloaded .msi file. The installer will automatically detect your Autodesk products and install the plugin in the correct directory.
Uninstallation: You can unload the plugin by exiting the Autodesk product and running the installer again (selecting "Remove"), or by using the Windows Control Panel > Programs and Features.
Additional Information
Known Issues
Background Hatching: While the slope lines are generated accurately using the projection algorithm, the optional "Background Hatch" feature may occasionally require manual adjustment. In scenarios with complex or self-intersecting geometry, the hatch might not fill the area completely or may spill outside boundaries. Users may need to adjust the hatch boundaries manually in these specific cases.
Contact
Author/Company Information
Support Information
For support, feedback, or feature requests, please contact Green Road Group:
- Email: GreenRoadGroup2018@gmail.com
- Website: https://www.greenroadgroup.com.ge
We aim to respond to inquiries within 24-48 hours.
Version History
| Version Number | Version Description |
|---|---|
|
1.1.2 |
Bug Fixes & Logic Improvements Version 1.1.2 - Critical Bug Fixes & Stability Improvements 3D Polyline & Feature Line Fix: Resolved an issue (eInvalidInput exception) that occurred when generating slopes between complex 3D Polylines or Civil 3D Feature Lines. The projection algorithm has been entirely rewritten using strict Z-Axis projection for high-elevation geometries. Closed Loop Seam Handling: Fixed a calculation bug where the slope pattern would occasionally draw along the longer path when crossing the start/end seam of a closed boundary. Enhanced Stability: Added comprehensive error handling to prevent plugin crashes when users select invalid, zero-length, or self-intersecting geometries. Visual JIG Precision: Fixed a bug where the real-time preview (JIG) would jitter on large coordinate systems. It now provides smooth, 1:1 accurate placement. Z-Axis Orientation Fix: Improved the Auto Cut/Fill detection logic. The plugin now accurately identifies elevation differences (Toe vs. Crest) to orient patterns correctly in 3D space. Layer Management: Fixed an issue where the plugin would fail if the target layer was locked or hidden. It now handles layer states more gracefully. |
|
1.1.1 |
Initial release -Full 2025/2026 Support: Added native support for AutoCAD and Civil 3D 2025-2026 (.NET 8.0), while maintaining backward compatibility for 2021-2024 (.NET 4.8). -Improved UI Integration: The plugin panel now seamlessly merges into the default Autodesk "Add-ins" ribbon tab for a cleaner workspace. -Offline F1 Help: Added comprehensive, professionally formatted offline HTML documentation. Users can now press F1 while hovering over the ribbon icon to access step-by-step guides and algorithm explanations. -App Manager Optimization: Added a high-resolution .ico file for proper branding inside the AutoCAD App Manager. -Live Preview Enhancements: Optimized the interactive "Live Preview" performance and fixed minor bugs related to pattern generation on highly complex or intersecting geometries. -Installer Updates: Updated the .msi package to handle automatic uninstallation of previous versions cleanly. |
