
Mostra - Parameter Visualization
Win64, EnglishGeneral Usage Instructions
1. Launch Autodesk Revit.
2. Open or create a Revit project.
3. Switch to the AvantLeap Tools tab in the ribbon. The Mostra panel appears with two buttons: MOSTRA and MOSTRA PRO.
4. Activate a supported view — a floor plan, section, elevation, or 3D view. Schedule, legend, and sheet views are not supported as the active view for any Mostra operation.
5. Confirm that the view contains visible model elements. If the view is empty or shows only annotation, the Category list will be empty.
Using MOSTRA (single-category mode):
6. Click MOSTRA. The Mostra dialog opens.
7. Select one element category from the Category dropdown. The list shows all categories that have visible elements in the active view.
8. Select one parameter from the Parameter dropdown. The list shows all parameters shared by the selected category.
9. Select a color palette from the Color Palette dropdown. Six palettes are available: AvantLeap, Rainbow, Traffic Light, Pastel, High Contrast, and Random.
10. Select an operation: Create Views, Apply Filters, Apply Overrides, or Reset View.
11. Click Execute. Mostra groups the elements by the selected parameter value, assigns a color from the chosen palette to each group, and performs the selected operation.
12. The Results window opens automatically, showing the group names, the number of elements in each group, execution time, and any warnings or skipped groups. Close the Results window when the review is complete.
Using MOSTRA PRO (multi-category mode with presets):
13. Click MOSTRA PRO. The Mostra Pro dialog opens.
14. Tick one or more categories in the category checklist. Use the search field to filter the list by name. Click All to select every visible category, then untick the ones you do not need.
15. Select one parameter from the Parameter dropdown. The list shows parameters shared across all selected categories.
16. Select a color palette and an operation as described in steps 9 and 10.
17. To save the current configuration as a preset: click Save in the Presets section, enter a name in the dialog that appears, and click OK. The preset is saved to the local machine.
18. To load a saved preset: select its name from the presets dropdown and click Load. All settings are restored automatically.
19. To delete a saved preset: select it from the dropdown and click Delete.
20. Click Execute to run the operation. The Results window opens as described in step 12.
Using Reset View:
21. To remove all Mostra-created filters, overrides, and hidden element state from the active view, select Reset View as the operation in either mode and click Execute.
Notes:
- Create Views produces isolated 3D views named AVLP_ISOLATED_{Value}_{Category} in the Project Browser.
- Apply Filters creates parametric view filters named AVLP_{Category}_{Value} that persist in the model and appear in the Visibility/Graphics Overrides dialog for all team members.
- Apply Overrides applies color directly to elements in the active view without creating persistent filters.
- MOSTRA PRO presets are stored locally. They are not embedded in the Revit model and are not visible to other team members on different machines.
Screenshots

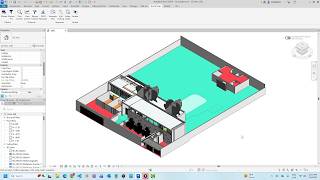
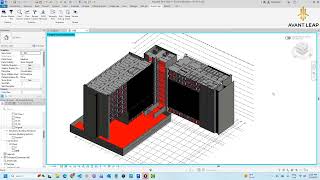

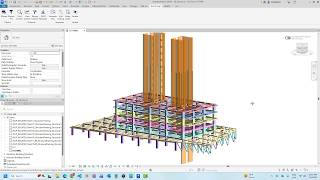
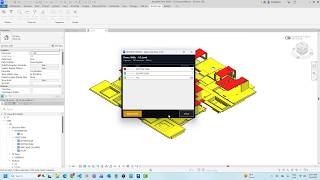
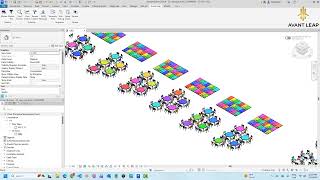
Commands
| Ribbon/Toolbar Icon | Command | Command Description |
|---|---|---|

|
Mostra |
Open Mostra - select a category and parameter to create views, apply filters, or apply overrides grouped by parameter value. |

|
MostraPro |
Open Mostra Pro - select multiple categories and a shared parameter to create views, apply filters, or apply overrides. Supports named presets for recurring workflows. |
Installation/Uninstallation
The installer that ran when you downloaded this app/plug-in from the Autodesk App Store will start installing the app/plug-in. Simply double-click the downloaded installer to install the app/plugin. Make sure that Autodesk Revit is completely closed when running the installer.
To uninstall this plug-in, exit Autodesk Revit if currently running, then rerun the installer and select the "Uninstall" button. Alternatively, go to Control Panel > Programs > Programs and Features (Windows 10/11) and uninstall as you would any other application.
Additional Information
For detailed usage instructions and workflow examples, visit our Quick Guide:
www.avantleap.com/quickguide-mostra
System Requirements:
- Autodesk Revit 2023, 2024, 2025, 2026, or 2027
- Windows 10 / 11 (64-bit)
- .NET Framework 4.8 (Revit 2023–2024) .NET 8.0 (Revit 2025) or .NET 10.0(Revit 2026-2027)
Compatibility:
Revit 2023, 2024, 2025, 2026, 2027
Known Issues
No known critical issues in this version.
If you encounter any issues, please contact us at info@avantleap.com.
Contact
Author/Company Information
Support Information
For support, questions, or feedback, please contact us at:
Email: info@avantleap.com
Website: www.avantleap.com
Quick Guide: www.avantleap.com/quickguide-mostra
We aim to respond to all support requests within 2 business days.
Version History
| Version Number | Version Description |
|---|---|
|
2.0.0 |
Initial release of Mostra previously known as Object Visualizer. Includes MOSTRA (single-category) and MOSTRA PRO (multi-category with presets), four operations — Create Views, Apply Filters, Apply Overrides, Reset View — and six color palettes. Compatible with Revit 2023 through 2027. |
|
1.0.3 |
Initial Release, three main functions, using only shared parameters related to Text. Create Isolated Views, Create Filters on View and Create Overrides. |
