
Wood Framing
Win64, EnglishGeneral Usage Instructions
Very important recommendations for your architectural model:
- Layer the walls/floors/roofs the way the parts of the framing will be modeled.
- Avoid abnormal wall forms.
- Model walls/floors/roofs the way they are to be paneled & prefabricated.
- Pay attention to wall connections.
For more details regarding recommendations, READ MORE & WATCH THIS VIDEO (1:19-11:00)
To frame a wall, follow the steps & watch the videos below. A similar workflow applies to framing floors & roofs.
▬ 1: How to load framing families [VIDEO]
In the Wall+ ribbon, click Settings > Load Families. Select families > OK.
How to rename framing families & types [VIDEO]
▬ 2: How to set framing configurations & apply them to a wall [VIDEO]
Framing Configs lets you predefine how framing families are placed in your architectural model. E.g. how many top plates, spacing between studs, etc.
Two ways to find Framing Configuration: Frame Wall or Configs menu.
At the top of the window, create a new framing configuration for the selected configuration type (framing layer). Duplicate an existing configuration by using ‘Save As’ and then change settings as needed.
On the left side of the window, choose frame settings. E.g. to change stud spacing, click Wall Framing > enter the desired value in Stud Spacing.
By default, Wall+ framing configurations are saved in C:\Users\USER\AppData\Roaming\Tools 4 Revit\Wall+2021 Configurations (or other version). To share configs, the content from this catalog can be copied to other users' computers or placed in a shared location. Also, the path can be changed in Wall+ → Settings → Configuration Files’ Location.
To link wall-type layers with your framing configs, click Link Wall > set Framing Layer > set Framing Configuration > in Frame column, tick only the layers that you want to frame > OK
▬ 3: How to model vertical/horizontal framing elements [VIDEO]
In Framing Configs, select Wall Framing > make desired settings in Vertical Stud, Top Plate, Bottom Plate & Offsets tabs. The symbolic preview shows how elements will be placed.
▬ 4: How to frame & modify wall connections [VIDEO]
Please watch the tutorial about framing L/T/V & start/end connections.
▬ 5: How to frame openings [VIDEO]
Open Framing Configs > click Opening Framing. Across the top are tabs for setting configurations for windows, doors & other openings. Note: in each tab is an upper & lower section; these are for Non-structural & Structural Walls, respectively.
E.g. to create a new window frame config, go to the Window Framing tab > click Edit Configurations > at the top of the dialog, select an existing configuration to build off of > Save As > rename it > OK. Remember, the wall & config must be linked in order to frame.
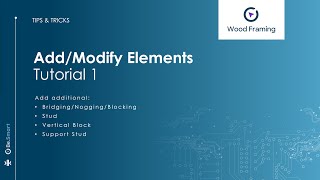
▬ 6: How to add/modify elements, like nogging and studs [VIDEO]
To add additional elements, open the Add/Modify Elements menu. There are commands for adding additional vertical & horizontal elements.
- How to add additional studs, vertical blocks, support studs & horizontal elements [VIDEO]
- How to add copied elements, external elements, and external elements as braces [VIDEO]
▬ 7: How to make unique wall framing modifications without having to modify linked framing configs [VIDEO]
Use Modify Frame to modify framing members, opening framing & wall joins.
▬ 8: How to split parts for sheathing/paneling layouts [VIDEO]
Link sheathing/paneling configs with wall type. Select wall instance or framing element > click Split Parts. To see the result, make sure the Part Visibility Parameter is set to Show Parts.
▬ 9: How to number walls, elements, and parts [VIDEO]
To create assemblies, walls need to be numbered. Click Number Elements > Number Walls. Then use Number Elements & Number Parts.
▬ 10: How to generate shop drawings [VIDEO]
Click Create Assembly > select any element from frame > select a drawing config > Create. Assembly can be found in the project browser. Drag-n-drop views onto the sheet.
To control Assembly Views, Schedules & Sheets, click Create Assembly > Drawing Configuration.
Screenshots


Commands
Installation/Uninstallation
Install or uninstall the app according to standard procedures.
Download the app from the Autodesk App Store.
Double-click the file to start the installation process.
Follow the instructions on your screen.
Installation file path: C:\ProgramData\Autodesk\Revit\Addins\[YYYY]
To uninstall, go to Control Panel > Programs > Programs and Features > right-click your Arkance Dock [version] > choose Uninstall.
Additional Information
Part of the Be.Smart Timber Collection
Known Issues
Contact
Author/Company Information
Support Information
Access E-help via F1 or the Help button in the app's main menu.
Technical documentation: https://docs.agacad.com/3d-modeling-and-design/wood-framing
To begin working with the app, please watch our Getting Started tutorials.
More advanced operations may be found in our Framing Tips & Tricks series.
Version History
| Version Number | Version Description |
|---|---|
|
1.1.0.17 |
• Includes new release for Revit 2025 • Simplified UI • Framing Configurations now a floating window • Apply changes, see them instantly • Wall/Floor/Roof Link functionality now integrated into the Framing Configuration window • More control over offsets for edge openings • New possibility to "Save Opening Configuration" • New functionality to “Modify Multiple Openings” for sheathing and paneling • Copy sheathing and paneling layers to all identical walls, floors, and roofs • Predefine variable (or fixed) configurations for sheathing/paneling layers • Wall Link integrated in sheathing and paneling configuration windows • Select parts by layer in wall • Predefine different configurations for specific wall types for T / L / V connections • Frame the main frame as well as all additional layers in one go using the new “Frame All Layers” command • Copy crop settings from existing views |
|
1.1.0.11 |
• Includes new version for Revit 2025 • Simplified UI • Framing Configurations now a floating window • Apply changes, see them instantly • Wall/Floor/Roof Link functionality now integrated into the Framing Configuration window • More control over offsets for edge openings • New possibility to "Save Opening Configuration" • New functionality to “Modify Multiple Openings” for sheathing and paneling • Copy sheathing and paneling layers to all identical walls, floors, and roofs • Predefine variable (or fixed) configurations for sheathing/paneling layers • Wall Link integrated in sheathing and paneling configuration windows • Select parts by layer in wall • Predefine different configurations for specific wall types for T / L / V connections • Frame the main frame as well as all additional layers in one go using the new “Frame All Layers” command • Copy crop settings from existing views |
|
1.1.0.7 |
New release for 2024. The "Agacad Dock" has been rebranded as the "ARKANCE Dock". |
|
2020.1 |
New release for 2020 |
