
Material Path Lite
Win64, EnglishGeneral Usage Instructions
Open add-in in project or family environment. It will list all materials which have bitmap file paths. Double click on the file path, it will bring up the opening file dialogue for you to choose a new file. After choosing, the column will be on green background, which means it is ready to be applied. Or you can have two separate clicks on the same file path, it will activate text editing in the cell. Hitting the "Apply" button will apply new paths to the material. Before hitting the "Apply" button, all file paths are the same in the project, which means you can hit the "Reload" button to reset all pre-edited paths if you are not satisfied. Save as button is use for create ready to go Autodesk® Revit® file if you want to archive the file or send to outside consultants.
You can open the material browser by double-clicking on the material name in the Material column. If the material browser is already open, double click on the material name in add-in's form again, it will put the material name in the material browser's search box which can help you to find the material quickly.
For relative paths created by using Revit Option-Rendering-Additional render appearance paths, this add-in can test their validity. This add-in also provides an extra function for you to export or import your Additional render appearance paths by extracting data from Revit.ini or inserting data into it. It is very useful when you need to transfer your rendering settings to the new station. It’s located on the top strip menu named “RenderAppearancePaths”.
You can delete material by just right click on Material's name in the Material column and choosing delete from the menu. Or you can use the “Delete Material” button to delete all checked materials. Please be noted, that deleting material doesn't mean the asset related to also deleted. If it is a shared asset, the missing path will still be in the project. It will show up after reloading. This add-in only loads a unique asset, which means if another material uses the same asset, it won't be loaded into the form. For the sake of editing speed, you would not like to edit the same asset more than once.
There are Three settings in the Setting dropdown list.
- AONE Tab: let you choose to use our ribbon tab or just default Add-in ribbon tab. It will take effect on the next session of Revit. to include default Revit preset materials inside your project, which have not been modified by the user.
- Include Default Material: include default Revit preset materials inside your project, which have not been modified by the user.
- File Search Speed: By default, it is set to Fast. But if your network environment is complex or your equipment is not fast enough, you might need to set it at Mid or Slow. Otherwise, it may give false information about the validation of the file path.
There are two extra functions in the RenderAppearancePaths dropdown list.
- Export from Revit: export Additional render appearance paths by extracting data from Revit.ini and saving it as separate *.ini file. The preset name would be “User name”+Revit version+RenderPaths.ini.
- Import into Revit: import Additional render appearance paths from your custom *.ini into Revit.ini. It will take effect in the next session of Revit. It will also back up the original Revit.ini as Revit_Backup.ini in the same directory.
Tips: For editing large projects in a complex network environment in 2020 and the prior version, it would be better to finish editing all missing paths before hitting the apply button. Because it will take a longer time to start processing the first material. Sometimes, take more than 2 to 5 mins, it depends on how complex the network environment your computer is in, especially when the original paths start with //192.168... If it is hanging there, it's not dead, just needs more time and patience. But after that, the rest of the materials may be processed more smoothly. Check Purge Unused AppearanceAssets will greatly improve material browser and this app performance (Default is checked).
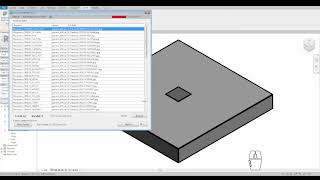
Screenshots


Commands
Installation/Uninstallation
The installer that ran when you downloaded this app/plug-in from Autodesk App Store will start installing the app/plug-in. OR, simply double-click the downloaded installer to install the app/plugin. You may need to restart the Autodesk product to activate the app/plug-in. To uninstall this plug-in, exit the Autodesk product if you are currently running it, simply rerun the installer, and select the "Uninstall" button. OR, click Control Panel > Programs > Programs and Features (Windows 10/11) and uninstall as you would any other application from your system.
Additional Information
Known Issues
Contact
Author/Company Information
Support Information
Version History
| Version Number | Version Description |
|---|---|
|
1.0.6 |
-Add Revit 2027 Support -delete material bug fixed. |
|
1.0.5 |
-Add Revit 2026 Support -Add Save as function for ready to go file. |
|
1.0.4 |
-Added Revit 2025 Support |
|
1.0.3 |
- Added purge unused Appearance Assets at start up. |
|
1.0.2 |
- Added Exporting custom bitmap files function. |
|
1.0.1 |
- Added Revit 2022 support |
|
1.0.0 |
- First Public Version |
