
ReUniXchange
Win64, EnglishGeneral Usage Instructions
- Open your Revit project.
- If your model includes modular groups, click Assign Modular Parameter to assign a shared parameter called ModularID. This step is optional for non-modular projects.
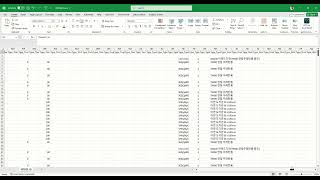
- Click Export Metadata to extract BIM data from the current Revit view to a CSV file. This file includes properties such as element type, material, and parameters.
- (Optional) Click Export Material to export all materials into MTL files with texture images. Skip this if you plan to use custom materials in Unity.
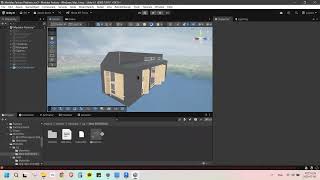
- Click Export OBJ to export the current 3D view to OBJ and MTL format with texture mapping. Do not rename the OBJ or MTL files.
- Import the OBJ, MTL, textures, and CSV into Unity. In Unity’s Inspector, enable Legacy Material Import to auto-assign materials.
- In Unity, you can modify object positions, groupings, or metadata and then export those changes as an XML file.
Click Import XML in Revit to automatically apply changes made in Unity back into the original Revit model. (but the XML file should be the one which is export from Unity using the unity package link given in the description)
Screenshots


Commands
| Ribbon/Toolbar Icon | Command | Command Description |
|---|---|---|

|
Assign Modular Parameter |
Assigns a shared parameter named ModularID to all components inside Revit groups. The value of the parameter is set to match the group name. This allows modular units to be tracked and reconstructed in Unity. This step is optional for non-modular buildings. |

|
Export Metadata |
Extracts BIM metadata from the current active view and saves it as a CSV file. The exported data includes properties such as element ID, category, family, type, and any assigned shared parameters. This metadata can be linked to 3D objects inside Unity. Do not use Excel export due to formatting issues. |

|
Export Material |
Exports all materials used in the Revit model to MTL files along with associated texture images. These files are compatible with Unity's material system and help preserve visual appearance. This step is optional if materials will be reassigned in Unity. |

|
Export OBJ |
Exports the currently active 3D view as an OBJ file with a corresponding MTL file and textures. The exported files are optimized for Unity import. Do not rename the OBJ or MTL files after export, as Unity requires matching names to apply materials correctly. |

|
Import XML |
Applies changes made in Unity back into the Revit model using an XML file. The XML may include updated positions, groupings, or metadata values. This enables bidirectional data exchange between Revit and Unity. Note: it does not import regular XML file and every revit model has specific XML file. |

|
About Me |
Opens the developer profile, including links to portfolio, documentation, and support information. |
Installation/Uninstallation
To install:
-
Download the installer file ( .exe).
-
Close all instances of Revit.
-
Run the installer as administrator. if you have already old version installed it will replace it with new version.
-
Set the version to match your current Revit version or choose to install for all versions e.g 2024, 2025, or 2026
-
Complete the setup and launch Revit. The ReUniXchange tab will appear in the ribbon.
To uninstall:
Open Control Panel > Programs and Features or Settings > Apps.
-
Find ReUniXchange in the list.
-
Click Uninstall and follow the instructions. it will automtically remove all the associated files with this plugin or just open the same setup file and uninstall.
-
Restart Revit if necessary.
Additional Information
Additional Information
ReUniXchange supports Revit 2024, 2025 and 2026.
Larger Revit models may take longer to export to OBJ.
All exported files are saved locally.
Known Issues
Contact
Author/Company Information
Support Information
Support Information
For help, bug reports, or academic collaboration, contact
Developer: Saddiq Ur Rehman
Email: saddiq.r.97@gmail.com
Version History
| Version Number | Version Description |
|---|---|
|
1.0.0 |
Initial version |
