
Conserve Box
Win64, EnglishGeneral Usage Instructions
Grid Annotation:
- Specify the position of grids (Top, Bottom, Right, and Left).
- The grid bubble is visible only at the checked positions.
- If required, check "Include Grid Dimension," and users can annotate all grids by clicking “Annotate All” or annotate only selected grids by clicking “Annotate Selected Only.”
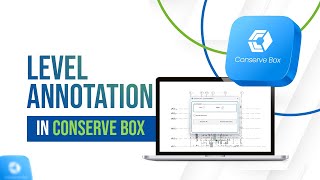
Level Annotation:
- Manage level bubble visibility and create dimensions for levels in elevation and section views.
- Specify the position of level bubbles (Left or Right) where they should be visible.
- Annotate all levels by clicking "Annotate All" or annotate only selected levels by clicking "Annotate Selected Only".
- Optionally check IncludeLevelDimension to automatically create vertical dimensions between levels.
Opening Dimension:
- Set the offset value to specify how far the dimension should be created from the openings.
- Users can annotate all openings by clicking “Annotate All” or annotate only selected openings by clicking “Annotate Selected Only.”
- Openings such as Doors and Windows should have “Right” and “Left” references within the Family Structure.
Section Dimension:
- Choose your selection method: “Select Active Model Elements” will create dimensions for the current Autodesk® Revit® model elements of Pipes, Cable Trays, and Ducts, while “Select Linked Elements” will create dimensions for linked elements.
- Select the level from which dimensions should be created, and users can set the dimension prefix for each category.
Dimension Align Text:
- This plugin allows you to align dimension texts vertically in Revit by using a selected dimension as a baseline reference, ensuring consistent and visually appealing text placement in your drawings.
- Once you select the dimensions to be adjusted along with a reference dimension, the script checks and aligns each dimension accordingly.
Plan Tagging:
- Go to any plan views - Select the element categories to be tagged, choose the respective tag families, and filter the elements based on type using the “Filter Options.”
- If no type is selected, tags will be created for all types within the chosen category.
- Set the clearance radius to prevent tag overlapping.
Elevation Tagging:
- Go to any Section or Elevation view - Select the element categories to be tagged, choose the respective tag families, and filter the elements based on type using the “Filter Options.”
- If no type is selected, tags will be created for all types within the chosen category.
- Set the clearance radius to prevent tag overlapping.
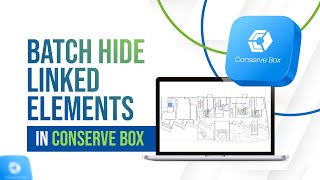
BatchHide LinkedElements:
- Hide multiple elements from linked Revit models in the current view.
- Select any number of elements from linked models that you want to hide.
- For Revit 2023 and above, selected elements will be hidden automatically.
Note:
The BatchHide LinkedElements plugin is supported only in Revit 2023 and later versions.Due to Revit API limitations in older releases,earlier versions of Revit cannot be supported
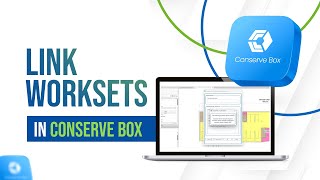
Link Worksets:
- Automatically create worksets for Revit links and assign them accordingly.
- Select one or multiple Revit links from the list to create dedicated worksets for each link.
- Optionally add a prefix to workset names (e.g., 'Z-' for linked models).
- After assignment, you'll receive alerts for any empty worksets that can be deleted.
Screenshots


Commands
| Ribbon/Toolbar Icon | Command | Command Description |
|---|---|---|

|
Grid Annotation |
Manage grid bubble visibility and create dimensions for orthogonal grids, ensuring clear and precise grid representations in your project views. |

|
Level Annotation |
Manage level bubble visibility and create dimensions for levels in elevation and section view, ensuring clear and precise Level representations in your project views |

|
Opening Dimension |
Create accurate dimensions for openings such as doors and windows relative to nearby grids in floor plan views, enhancing the precision of your architectural drawings. |

|
Section Dimension |
Create dimensions with user-preferred prefixes for MEP elements, including pipes, cable trays, and ducts in section views and CSD drawings, ensuring consistency and clarity in your technical documentation. |

|
Dimension Align Text |
This script aligns dimension texts vertically in Revit using a selected dimension as a baseline reference. It ensures consistent text placement by adjusting selected dimensions accordingly, resulting in a more organized and professional appearance. |

|
Plan Tagging |
Tag every element in plan views, such as doors, windows, and rooms, with advanced filtering options to prevent tag overlaps and maintain a clean and readable layout. |

|
Elevation Tagging |
Tag every element in elevation views, including doors, windows, rooms, and lintel elevations, with advanced filtering options to prevent tag overlaps and ensure clarity in your elevation drawings. |

|
BatchHide LinkedElements |
Hide multiple elements from linked Revit models in the current view by selecting them in batch—automatically hidden in Revit 2023 and above version. |

|
Link Worksets |
Automatically create worksets for Revit links and assign them accordingly by selecting links from the list, adding an optional prefix, and receiving alerts for empty worksets that can be deleted. |

|
Anchor Elevation |
Calculate and set elevation parameters based on nearest floor or ceiling distance by selecting elements, choosing detection options (Include Floor Mounted/Include Ceilings), and adding optional tolerance offset values. |
Installation/Uninstallation
The installer that ran when you downloaded this app/plug-in from the Autodesk App Store will start installing the app/plug-in. OR, simply double-click the downloaded installer to install the app/plugin.
To uninstall this plug-in, exit the Autodesk product if you are currently running it, simply rerun the installer, and select the "Uninstall" button. OR, click Control Panel > Programs > Programs and Features (Windows 10/11) and uninstall as you would any other application from your system.
Additional Information
Known Issues
The BatchHide LinkedElements plugin is supported only in Revit 2023 and later versions.Due to Revit API limitations in older releases,earlier versions of Revit cannot be supported
Contact
Author/Company Information
Support Information
Version History
| Version Number | Version Description |
|---|---|
|
1.2.0 |
Grid Annotation Tool now supports inclined grids. New tools added: Link Annotation, Batch Hide Linked Elements, Link Worksets, and Anchor Elevation. |
|
1.1.0 |
Updated compatibility for 2026. |
|
1.0.0 |
Initial version. |
